CI/CD using GitHub actions to deploy to Azure
Before we jump into the steps to setup CI/CD pipeline let’s quickly answer the question of what is GitHub Actions? Consider a repository on GitHub, there is all sort of events that can happen in that repository; push to a branch, issue created, new pull request … and many more, any of those events can trigger an automated workflow that runs in one or many containers in the cloud or on your own agents, GitHub actions gives you the means to provide the steps for those pipelines to do something for you. The great thing about actions is that instead of writing them from scratch there are hundreds of prebuilt actions for you to use, there is literally an action for everything you can think of; Build a java project, deploy to GCP, deploy to Azure even push messages to slack, and if you don’t find what you need, you can create your own action and reuse it in multiple projects. To start all you need is a GitHub account, and an Azure account. If you don’t have an Azure account go create one I’ll wait for you. If you already do let go to the first step.
Step 0 : Your awesome Node.js app #
I assume that you already have an awesome APP that you developed using one of the many great Node.js frameworks out there, If you don’t you can use this one of a kind random quote generator API that give you a random quote every time you ask for one.
To run the app locally use npm run start , this will spin up the API on a local server at http://localhost:1337, if you go ahead and open up that URL in a browser, every time you hit refresh you are going to get a random quote! isn’t that amazing.
To run the unit tests of this app you should first install the dependencies using npm install then you can use npm run test, this will run some not very awesome unit tests :( and you will see the results with green checkmarks indicating that our tests are OK.
Step 1 : Continuous Integration #
The whole idea behind continuous integration is to have developers submit their changes into the main code base in small maintainable chunks, and those changes should be automatically tested before integrating them into the repository.
To create a GitHub action it’s simple, you just create a YAML file inside your code base in .github/workflows , any file that you put in this folder will be picked up by GitHub and automatically set up a workflow for it.
Go ahead copy this content to .github/workflows/integration.yml
name: CI Workflow
on:
    push:
    branches: [master]
    pull_request:
    branches: [master]
jobs:
    build-and-test:
    runs-on: ubuntu-latest
    steps:
        - uses: actions/checkout@v2
        - name: Use Node.js 12.x
        uses: actions/setup-node@v1
        with:
            node-version: 12.x
        - run: npm ci
        - run: npm test
Commit and push this code, head to GitHub, click on the Actions tab
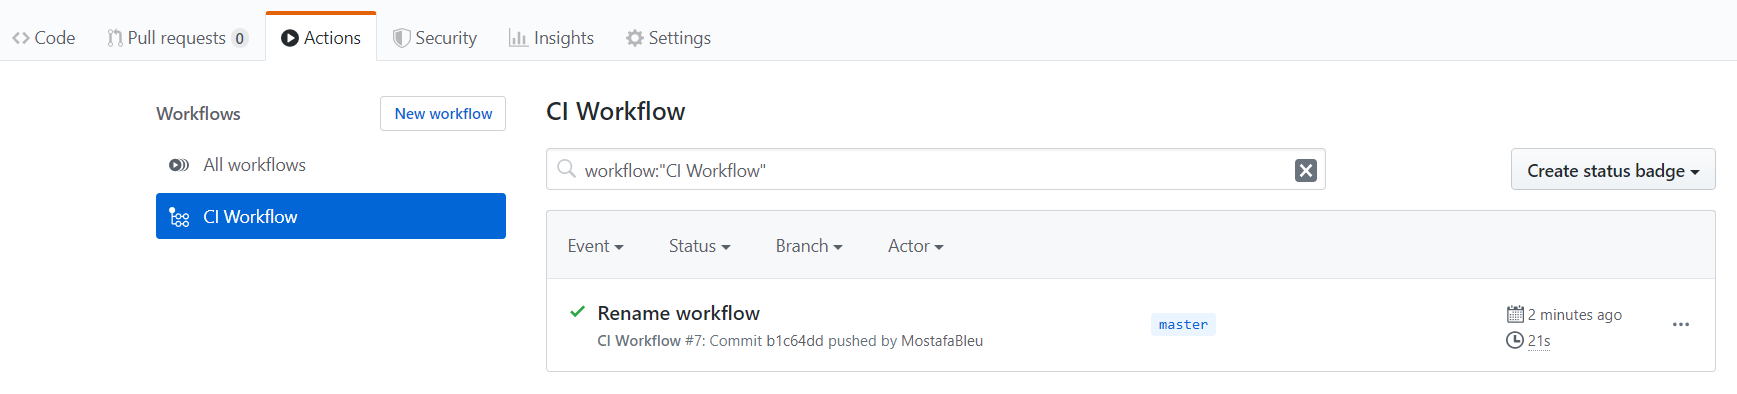
What just happened?
You got your first workflow triggered magically!
Let’s fast backwards a little bit, there is no magic here everything is done through a simple recipe that we’ve put in the integration.yml file
name: CI Workflow
In this first line we simply name the workflow, since we can have multiple workflows defined in our project each one doing something different it’s nice to give the workflows a significant name.
on:
    push:
    branches: [master]
    pull_request:
    branches: [master]
In this section we define the trigger. Triggers are the GitHub events that we want to trigger this workflow. We are doing continuous integration so we need this workflow to be triggered
- every time someone opens a pull request to the master branch so we build and test our code before we merge it
- every time a push happens in master, this way we have also a status of our build and tests after each merge.
jobs:
    build-and-test:
    runs-on: ubuntu-latest
    steps:
        # This steps checksout the code from our repository
        - uses: actions/checkout@v2
        # This step sets up Node.js version 12.x on the runner
        - name: Use Node.js 12.x
        uses: actions/setup-node@v1
        with:
            node-version: 12.x
        # Here we run npm install in CI mode to have clean package installs
        - run: npm ci
            # The demo I used is simple so we dont need to build it
        # that's why I jumped directly into running the tests
        - run: npm test
In this last section we define the jobs, as you can see we only have one job named build-and-test, but as you can imagine you might define multiple jobs. For each job we specify the runner we want to use, for this example we used the latest available ubuntu runner. It’s best practice to fix the version used in your workflow so you always have predictable results but for this tutorial since we have an awesomely simple app we wont worry about that happening. you can check all the available runners here or you can even host your own runners but this is going to be part of an other article.
Since YAML Supports comments I’ve put in the previous YAML as you can see what each step is for.
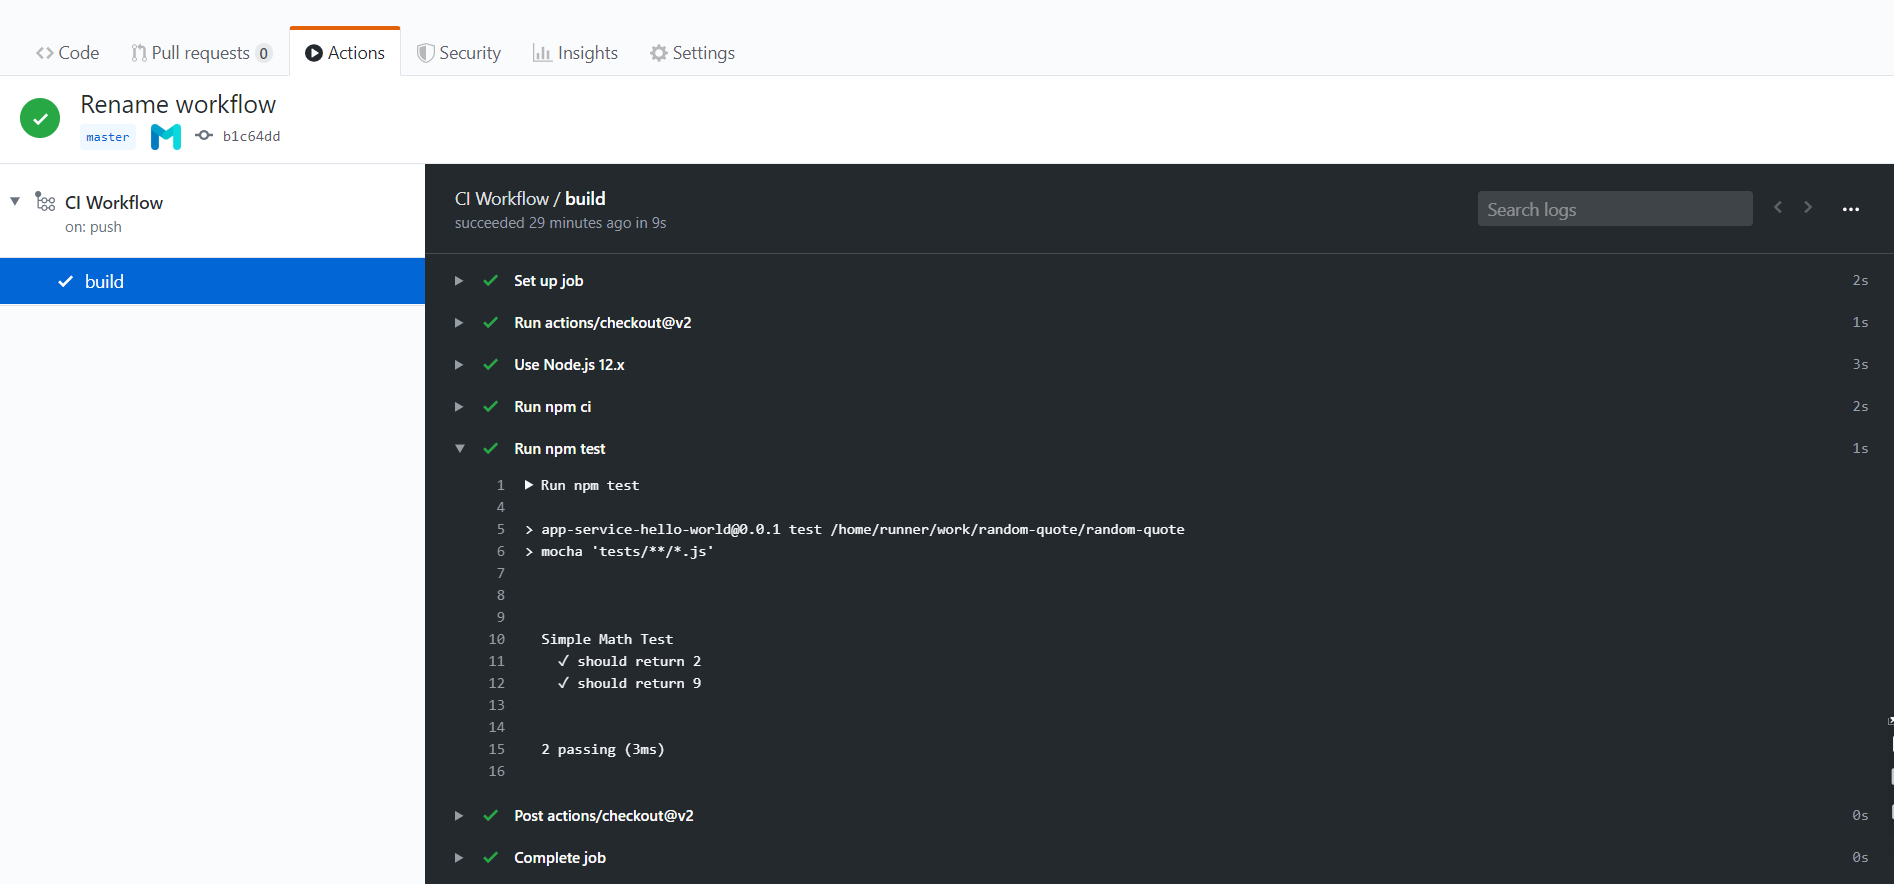
As you can see it’s simple to set up continuous integration with GitHub actions, and to finish with this step if you click on the name of the workflow you get a detailed log of all the steps
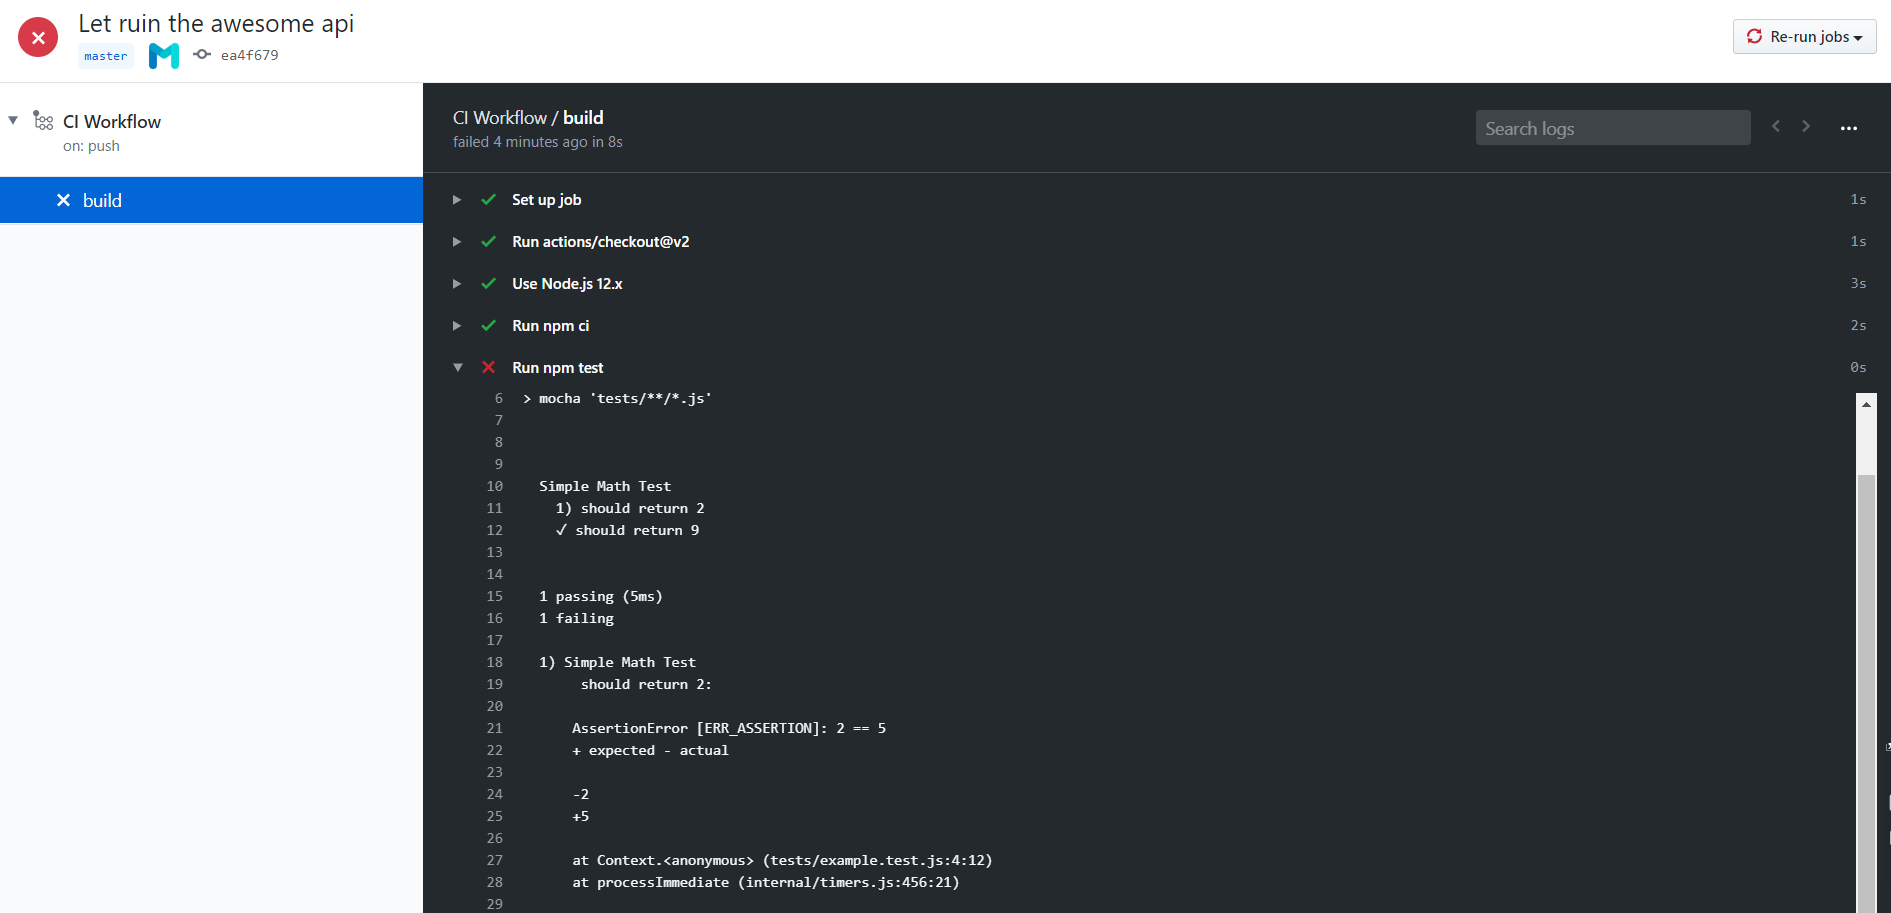
And If something is not good you immediately get a red cross and you are provided with a detailed log of what went wrong
Step 2 : Azure Web App #
1- Go to Azure portal
2- Click on Create a resource
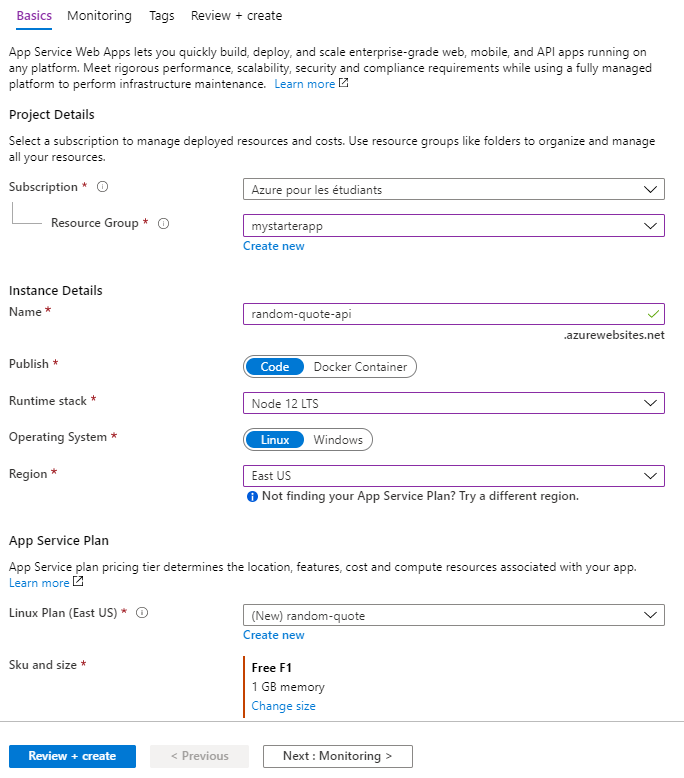
3- Look for Web App
4- Enter your app information, remember to put an awesome instance name since it’s what’s going part of your app URL, it should be globally unique so if you don’t get the right green check mark that means that name is already taken.
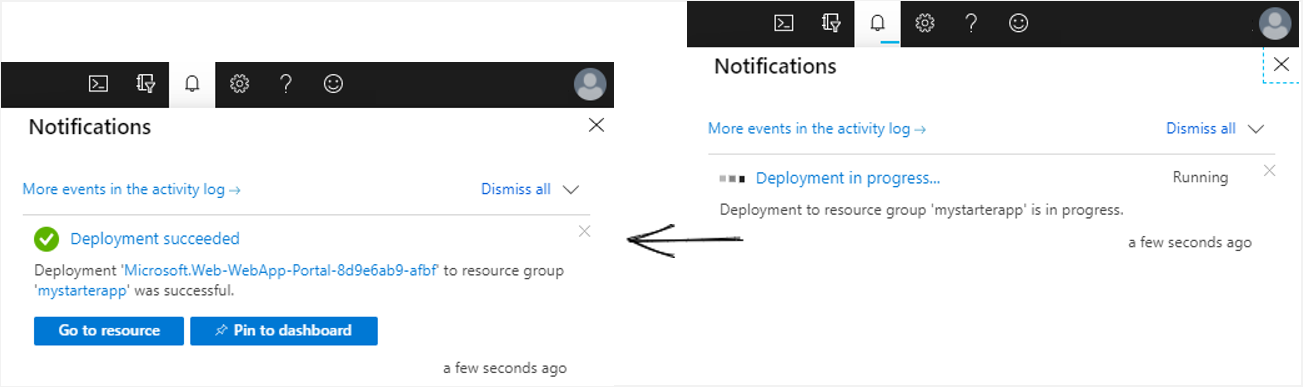
5- Once done click Create and wait for the deployment to finish , it shouldn’t take long
Step 3 : Continuous Deployment #
In this step we will automate the process of deploying the code into Azure Web App created in the previous step.
First we will need the credentials to be able to authenticate from GitHub to Azure and deploy the code. There are many ways to achieve this, I will use the publish profile :
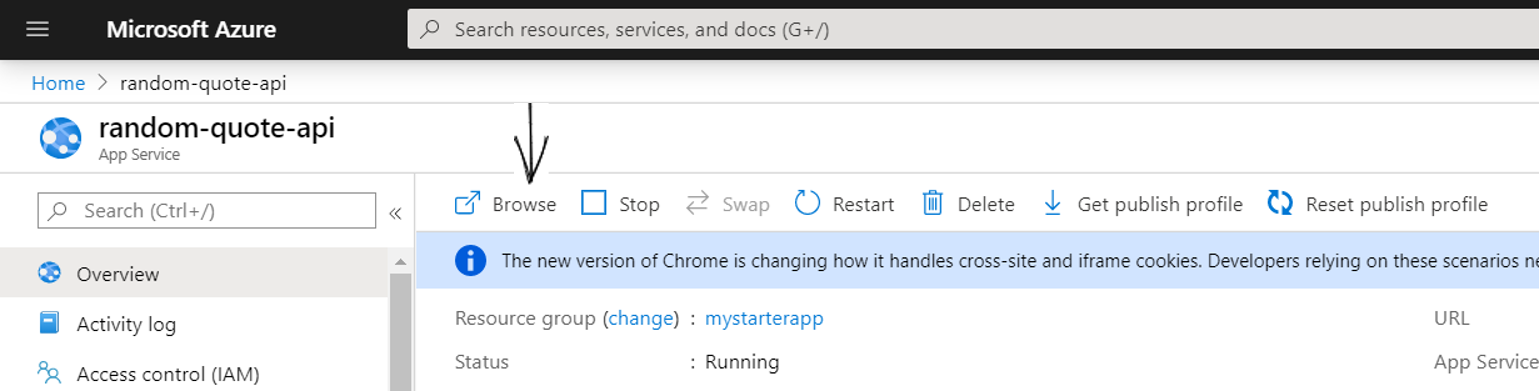
1- Go azure portal and navigate to the Web App, then click on Get publish profile

2- Save that file and don’t share it to the public, we will be using a feature of GitHub called secrets to store this so that our workflows can use it, Go to GitHub → Settings → Secrets → Add a new secret
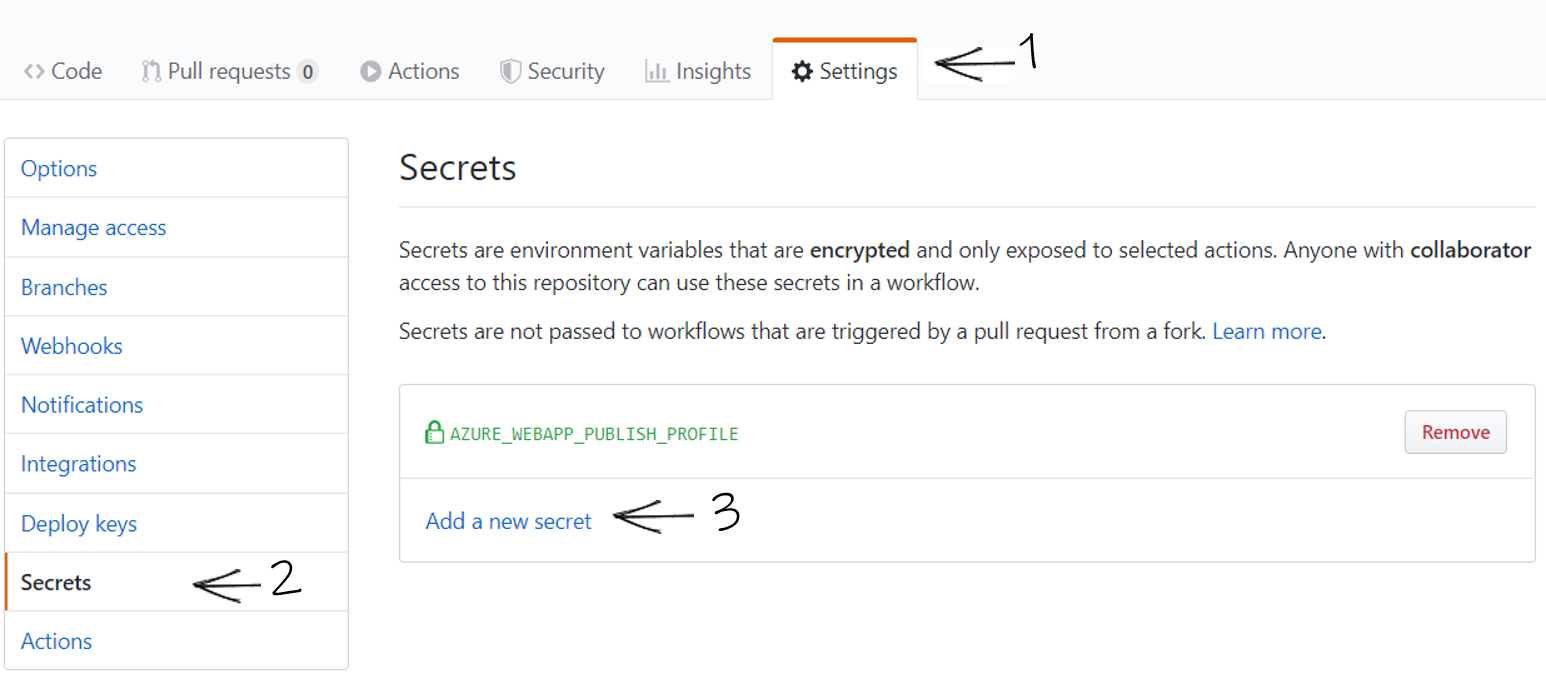
3- Name the secret AZURE_WEBAPP_PUBLISH_PROFILE and paste the content of your PublishSettings, GitHub will encrypt it and only make it accessible to the runners, you will no be able to edit this value once saved, if you want to change the value you simply remove the secret and add it again with the new value.
4- Now it’s time to define our deployment workflow, can you guess what we should do ?
Exactly! write a new YAML file and put it in the .github/workflow folder.
name: Deploy Workflow
on:
    release:
    types: [created]
env:
    AZURE_WEBAPP_NAME: random-quote-api
    AZURE_WEBAPP_PACKAGE_PATH: "."
    NODE_VERSION: "12.x"
jobs:
    build-and-deploy:
    name: Build and Deploy
    runs-on: ubuntu-latest
    steps:
        - uses: actions/checkout@v2
        - name: Use Node.js ${{ env.NODE_VERSION }}
        uses: actions/setup-node@v1
        with:
            node-version: ${{ env.NODE_VERSION }}
        - name: "Deploy to Azure WebApp"
        uses: azure/webapps-deploy@v2
        with:
            app-name: ${{ env.AZURE_WEBAPP_NAME }}
            publish-profile: ${{ secrets.AZURE_WEBAPP_PUBLISH_PROFILE }}
            package: ${{ env.AZURE_WEBAPP_PACKAGE_PATH }}
In this file we used variables to show you how you can make your workflows reusable, notice the use of the prefix env. to get the environment variables, and the use of secrets. to get the publish profile.
An other thing I want you to pay attention to is the trigger, for the deployment we don’t want to be deploying a new version every time someone creates a pull request or every time a new push is done to master, the trigger we are using is when ever a new release is created.
Go ahead commit and push this file and let’s test this.
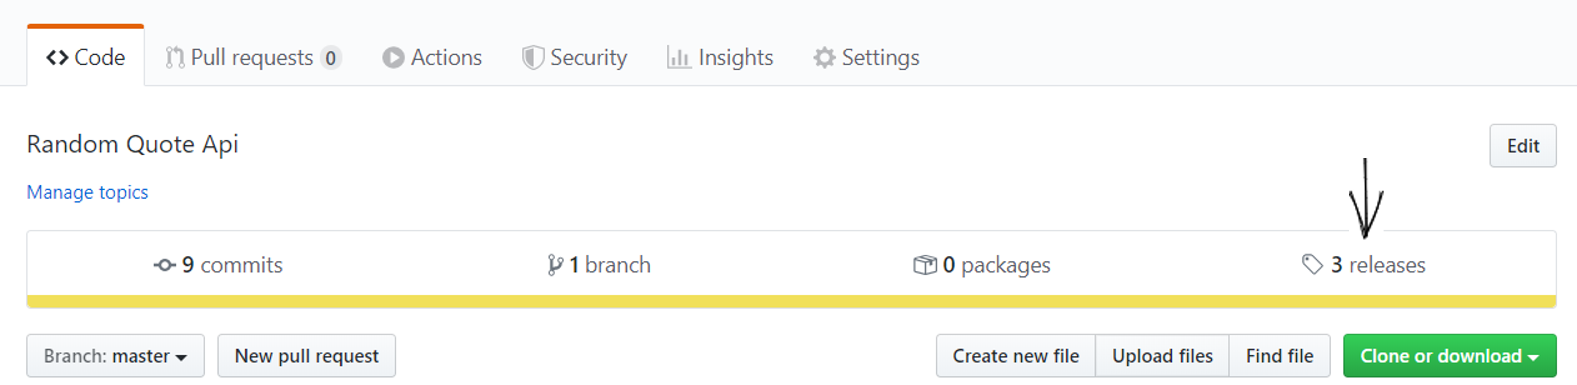
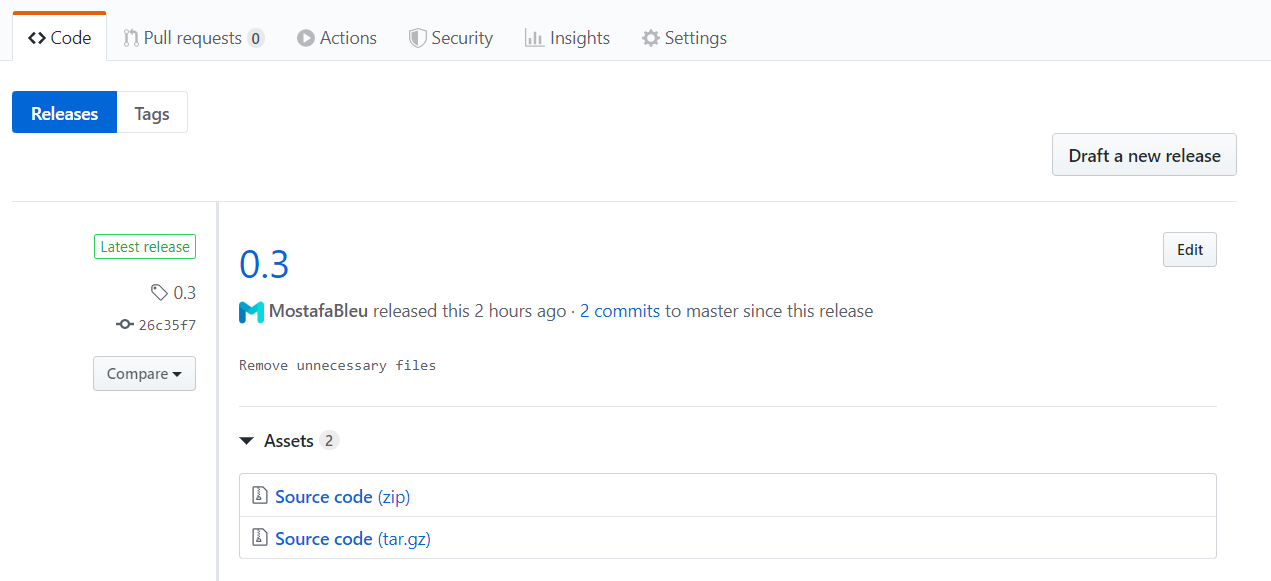
5- Create a new release, in your GitHub repository click on Releases
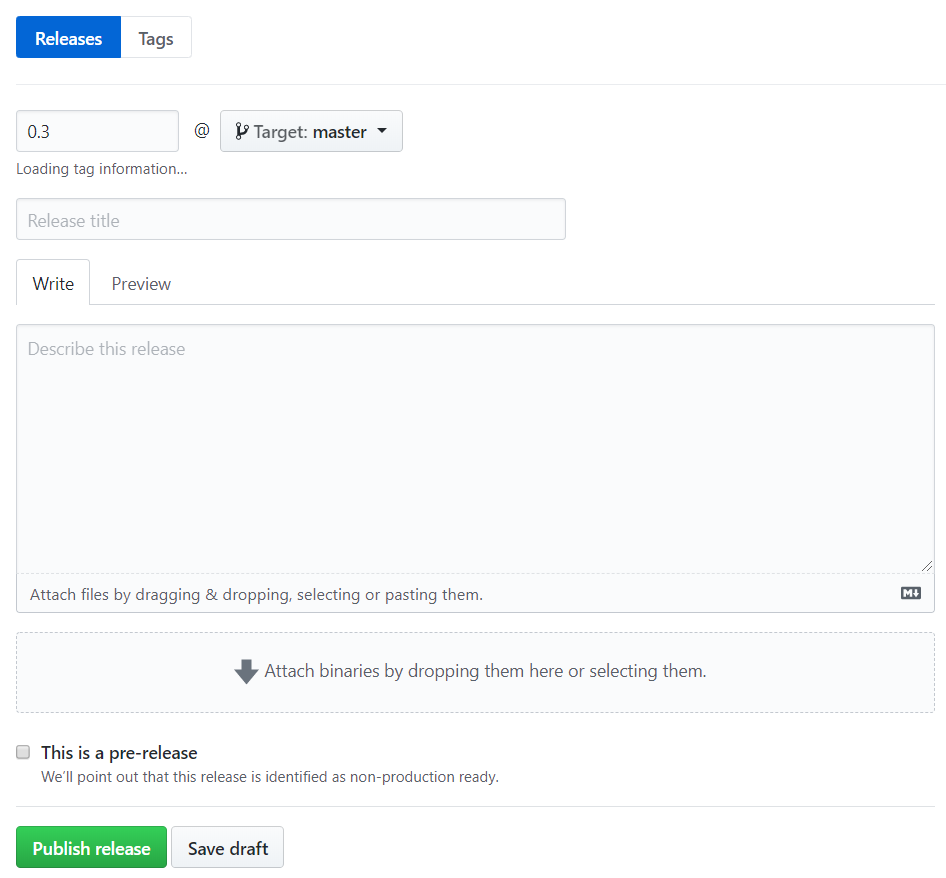
Then click on Draft a new release

After that just fill in the form once done click on Publish release
This should create a new release, if you go back to release you will see it there
Now go to the Actions tab again and you should have a new workflow which also got triggered by creating a new Release

And Since it’s green your app should be live, if forgot the URL to your Awesome API you can go pack to the Azure Portal, navigate to your Web app and if you click on Browse you get to the main page of the Web App
Summary #
I hope that this tutorial helped you get started with automating workflows on your own projects, GitHub actions has many other features I didn’t cover here, like the scheduled triggers, parallel and depends Jobs. Personally I find it very convenient to set up CI/CD workflows directly on GitHub without having to rely on an other external tool. and the fact that the workflow is defined as code makes it AWESOME
